Neha Gupta
Data Transfer one component to another – Angular 7
Last updated  September 24, 2021
Data sharing is an essential concept to understand before diving into your first Angular project. In Angular mainly we have four methods by which a component can share data and information with another component by passing data or events :
Components can communicate to each other in various ways, including:
- Parent to Child: via Input
- Child to Parent: via Output() and EventEmitter
- Child to Parent: via ViewChild
- Unrelated Components: via a Service
One thing you need to know, these above are the decorators which we are using within the Angular application. The first thing which comes to your mind is, what is Decorator ? So I suppose that you have a basic idea about decorators. If you have not then, I will suggest first take a basic idea about decorators.
Here I will explain all four types of methods one by one so let’s start with the first type of data transfer type i.e: via Input. So I will begin with a very basic & common example, suppose we have a filter component & order list component on which we have to use this filter component.
Setting up our Application:
Let’s use Angular CLI to set up our application. If you don’t have Angular CLI installed on your machine, run the below command to install it globally.
npm install -g angular-cli
After Angular CLI installation, to create a new Angular project, Run the below command. This command will create all the necessary files, download all the required external dependencies and do all of the setup work for us.
ng new your-app-name
This command will ask questions that “would you like to add angular routing?” so, if you want to add routing in your application, just press “y” & then enter, again it will ask about that which stylesheet do you want to use? so on choose CSS & then enter. So now your app will create with a routing module & with CSS style format as default.
Creating components in the Angular application is very easy with the help of Angular CLI. The below command is used to create a component.
ng generate component component-name
Run the below commands to create components,
- To create filter component run : ng generate component filter
- To create order list component run : ng generate component order-list
As you create components, it will automatically import into your app.module.ts. If not, you have to import both of these components manually in app.module.ts & also in imports arrays. Now you are good to develop your first angular application.
Parent to Child: Sharing Data via Input()
After Set up basic application just write code into filter component to filter records of order list by name. For ex:

Next, you have to write code to show the list in order component with some pre-filled data like the below screenshot:
In order to list components, I have used a filter component selector. As I am using the filter component under order list component, the filter component will be known as child component & the order-list component will be known as the parent component.

Filled order list with some random data so we can apply filter. Below is the screenshot of ts file of order list component.
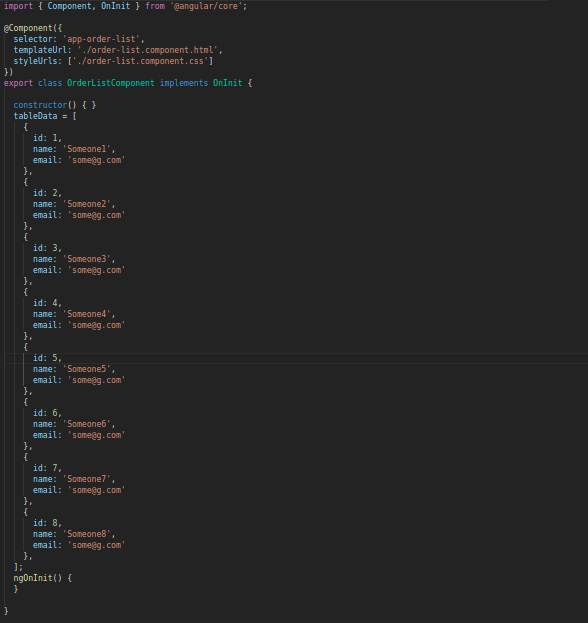
So as you can see, in the ts file we declare one property through which we populate data into the table. So now we assume that we want to transfer some data from the parent component i.e. order component, to child component i.e. filter component.
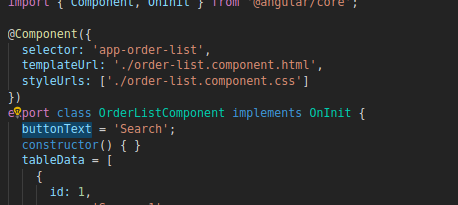
Suppose we want to send button text from parent to child component. For this, we use @Input decorator. So, you have to change in the parent component. Declare property buttonText & assign a string to it like:
Also, you have to make a change in the HTML file because we declare button text as a property with some default value, but we also have to send this button text from the parent component. To child component so to do this, we use property binding like this:

[] (square bracket) is known as property binding, so we bind the property of filter component text to order component property buttonText. Also, declare text as input in the child component. For this, you have to use @Input decorator like this:
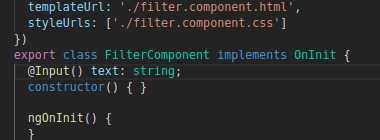
So now you can use text property in filter component where ever you want to use with a value of parent component. Whenever we change the value of buttonText from the parent component, the value of the text of the filter component gets automatically changed.
Child to Parent: Sharing Data via Output() and EventEmitter
Here we will use outputs and EventEmitter, before digging into this method, I assume that you have a basic idea of output() & EventEmitter.
Second way to share data is to emit data from the child. This approach is ideal for sharing data changes that occur on things like button clicks, form entities, and other user events.
In the parent, we create a function to receive the filter term and can be used in parent component to filter our data.
In the child, we declare a searchValue property with the Output decorator and set it equal to a new event emitter. Then we create a function named filter that calls emit on this event with the searchValue we want to send. Lastly, we create a button to trigger this function.
The parent can now subscribe to this searchValue that’s outputted by the child component, then run the OnApplyfilter function whenever this event occurs.
Now suppose we want value from filter component to parent component means whatever we write into the text field, that value should be in parent component so that we can filter our data. For this, we have to write click event in child component:

After this we have to write method on which this value will emit.

Because we want searchValue value in the parent component, so we have to bind this value by using event binding like this:

& also we have to write OnApplyFilter() function in our parent ts file:

Now you can do anything with this value whatever you want.
Child to Parent: Sharing Data via ViewChild
The next method to transfer data from child to parent component is ViewChild.
ViewChild allows one component to be injected into another, giving the parent access to its attributes and functions. However, the child won’t be available until after the view has been initialized. This means we need to implement the AfterViewInit lifecycle hook to receive the data from the child.
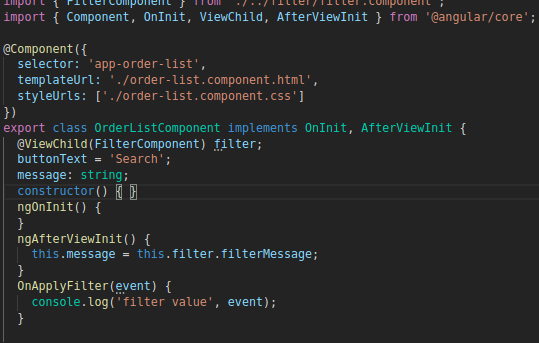
From the above screenshot you will understand that by using ViewChild we have injected child components into our parent components, so now we can access every property & method of child components easily. In our filter component, write the property of filterMessage with some value, and this value will be available into our parent component.
Unrelated Components: Sharing Data with a Service
Services are commonly used for storing data and making HTTP calls for retrieving, posting, updating and deleting the data we need in our application.
Now I am going to explain how we will share the data by service from one component to another while these are not in a paren- child relationship.
When passing data between components that lack a direct connection, such as siblings, grandchildren, etc, you should use a shared service.
So suppose here another component is product-list component by using same command:
ng generate component product-list
First, we create a service that holds the data. Since a service is a singleton, all of the components that inject this service can share the data from this service. For this, we create a service class by using this command
ng generate service data
Suppose we have some methods or data which both components i.e order-list & product-list component needs, then we can easily share that data by using service method.
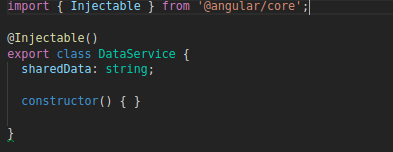
So As you can you we have declared one property in data.service.ts. SharedData property now can be accessible from any component from where you want. For this you have import data service into required component & also inject this service into your component like this:
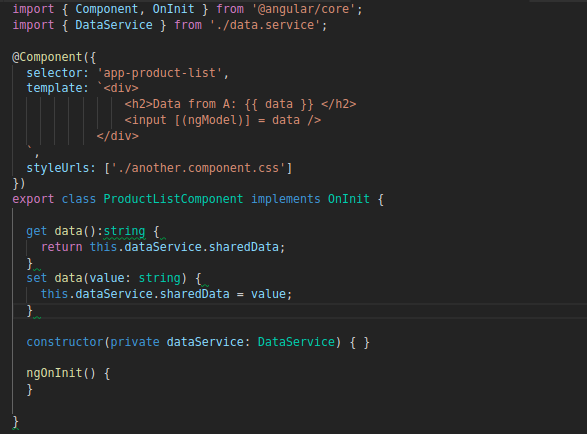
So As you understood from above screenshot that how we can get sharedData from data service & also set sharedData value which will be reflected in another component.

So, using the service we can transfer data from the unrelated component.
Summary
In this post, we have learned how to share data between parent and child components using @Input(), @Output and EventEmitter & also share data between unrelated components using service. Data sharing is a very important concept, and everybody needs to share data between the application’s components.
So I hope this article should have clear all your doubts regarding data transfer between components in angular 7. It’s upto you which method you want to use to the data transfer.